I'm going to build a local VM with the following requirements:
- It can host PHP/SQL-based websites
- It has PHPMyAdmin to help administer any SQL databases
- It matches available builds from popular providers (i.e. you can provision it in a similar way on Azure or AWS, but with a public domain name)
- It only has a single account (this is not recommended for public systems)
- I can access the web root using SFTP
As I already have several CentOS builds that have always been pre-setup with CPanel (and because CentOS is free), I've decided to do this build from scratch and without a control panel. I'm not going to be configuring options like multiple user accounts, so things will be fairly simple.
I'll do it in steps (and test each time) to make sure everything's working correctly. You could install everything all at once, but that would make it much harder to troubleshoot if an element didn't work.
Note: All of the commands for this post are available here on GitHub (the Wordpress engine sometimes strips double hypens and other formatting from code).
Step 1 - Pick up a CentOS distro and install it
The current publicly available release of CentOS is version 7 release 1611. The below should stand for any other minor release. I'm using the minimal ISO which lands at about 700MB.
https://wiki.centos.org/DownloadI'm not going to go into depth about installing the OS - take your pick of virtualisation software, my personal preferences are Microsoft's Hyper-V, or Oracle's VirtualBox. At this point it'll be beneficial to give them access to the internet to make installing the required modules much easier.
Step 2 - Update the base packages
We first want to update our system - this will update all installed packages to their latest versions. It's worth noting that the yum command uses pre-defined repositories that can be added to if you need software maintained outside of the standard setup.
yum updateNotice I've not used any flags - when we next run yum we will use -y, which assumes you wish to answer Yes to any prompts. As we haven't used this, we will get two prompts - both of which we need to answer "y" to.
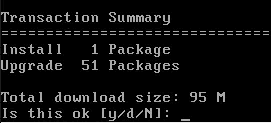
Confirm we'd like to install 1 package and update 51
We also have a key to confirm.
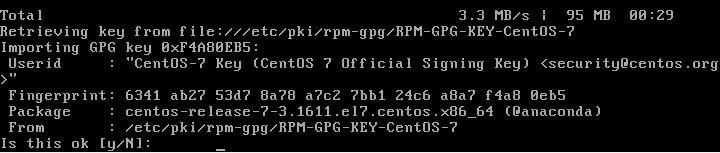
There's also a new key to import
! A note on using root
You may have noticed I'm actually logged in with root. This means I don't have to use "sudo" to execute these commands with admin privileges, but is not recommended for a public system (or any system really). This system will be not be publicly accessible, and I will provide a better user setup in a later post. If you DO use a new user, you will have to use the "sudo" command to execute the commands below with root privileges.
Step 3 - Install some useful utilities and repositories
First up, I'm going to add the nano and wget packages. Nano is my preferred text editor, and wget gives us the ability to easily grab files from the net and pull them to our local machine.
yum -y install nano wget
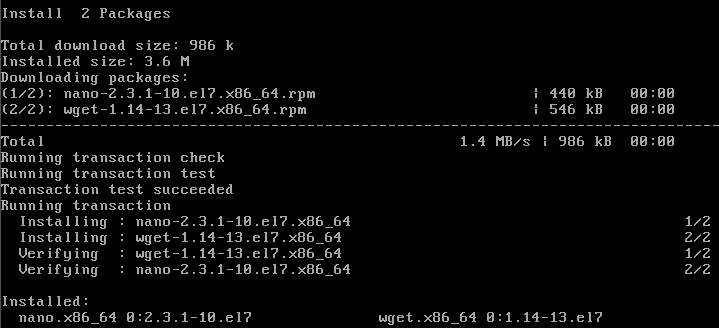
Installing wget and nano using -y yum flag
Step 4 - Install and Configure Apache
Let's install Apache web server:
yum -y install httpd
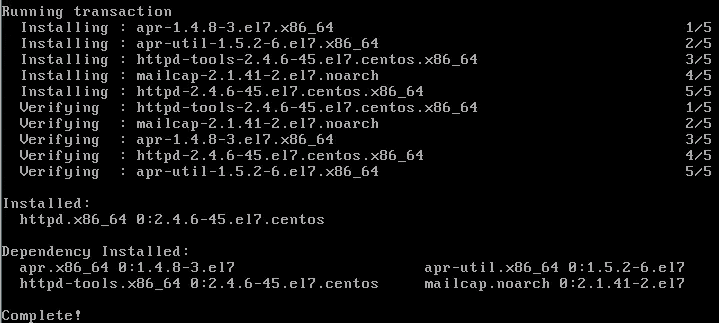
Installing httpd will bring in a few dependencies
FYI - httpd is the Apache HTTP server (notice it's installed v2.4.6). We will need to set it to start it:
systemctl start httpdAnd to start it automatically at boot:
systemctl enable httpdAnd let's check the status:
systemctl status httpd

or

service httpd status
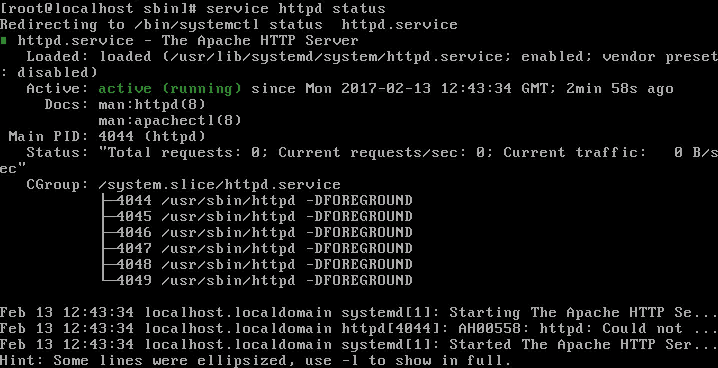
Apache httpd is active (running)
Next up is allowing access through the firewall. CentOS 7 ships with SELinux enabled, and although I've seen a lot of people turn this off (using "setenforce 0") to keep things simple, I'm configuring with it on. With the firewall on too, we'll need to run the following commands to allow port 80 and 443 for HTTP and HTTPS respectively.
Note: The commands below should be as per the image below with 2 x "-", unfortunately WP strips some strings when posting. Use the GitHub repo if you want the unformatted code.
firewall-cmd --permanent --zone=public --add-service=http firewall-cmd --permanent --zone=public --add-service=https firewall-cmd --reload

Firewall rules added and applied successfully
So - we should be able to browse to http://serverip/ and see the test page!
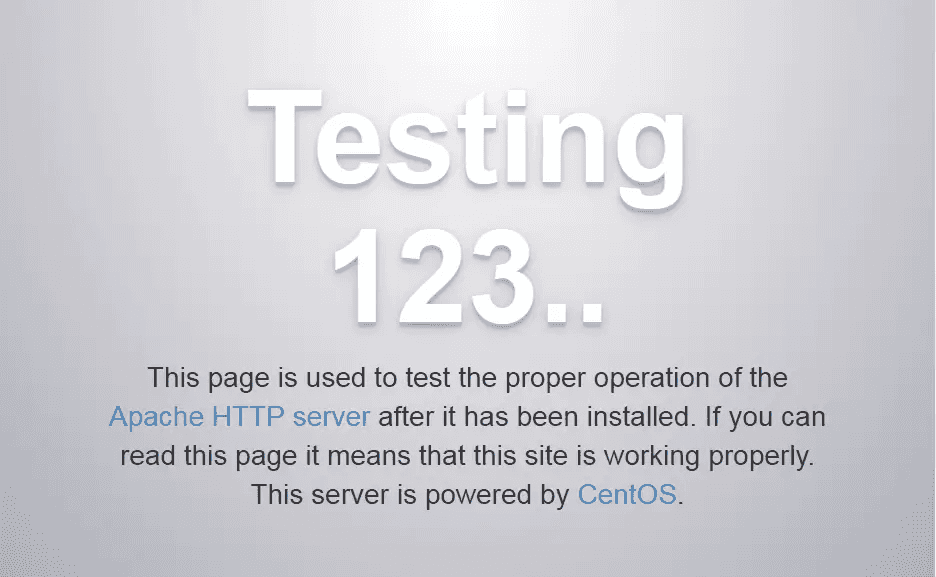
Apache is running, and the required ports are open
Step 5 - Install and configure MariaDB (the drop in replacement for MySQL)
Next up is our SQL engine. Previously you'd have used MySQL, but this has been replaced with MariaDB in CentOS7. MariaDB is a fully open-source replacement for MySQL (which has a number of closed modules), and has an active developer base with broadly reported performance benefits over MySQL.
It's worth noting that even older WHM/Cpanel installs will offer the automatic upgrade from MySQL 5.6 through to MariaDB 10.
yum -y install mariadb-server
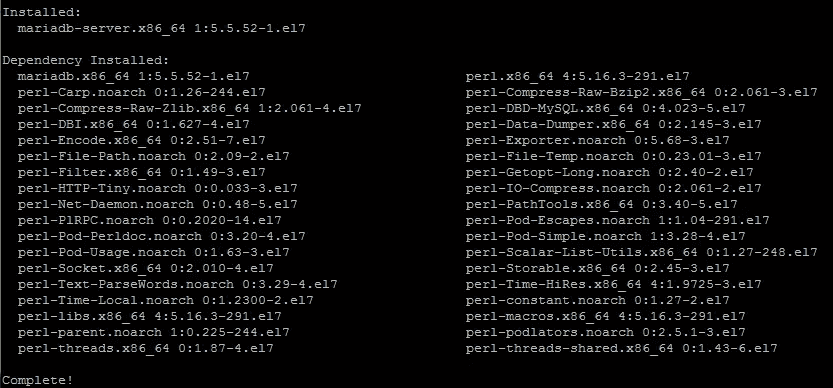
MariaDB brings a couple of dependencies as well
As with apache, we need to start and enable the MariaDB service:
systemctl start mariadb
systemctl enable mariadb
And now time to set up SQL on our system!
mysql_secure_installationThis wizard runs through a series of questions that will help you install MariaDB correctly - my answer are shown below.
-
Login with root password - This is a clean install so this should be blank. Press enter.
-
Set a root password - Yes. Set a secure password, this will be used later with PHPMyAdmin to give us easier access to all of the databases on the box
-
Remove anonymous users - Yes. I'd remove this user so we don't forget to do it later
-
Disallow root login remotely - Yes. This won't affect any locally running scripts, and encourages you to use individual user accounts for your databases, which is good practice
-
Remove test database and access to it - Yes. No need for the test database
-
Reload the privilege tables now - Yes. This completes the installation!
We can test that it's all working by logging into MariaDB via the console:
mysql -u root -pEnter your MariaDB root password and it should bring up the MariaDB prompt. You can exit with Ctrl+C.
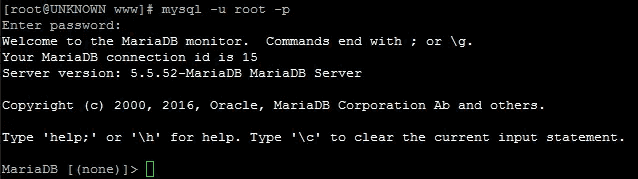
We are able to login to MariaDB
Step 6 - Install PHP
We're going to get PHP running by installing the base package (and dependencies) through yum:
yum -y install php
PHP and dependencies installed via yum
No big surprise here, but that will require a restart of Apache:
service httpd restartWe can now create a test file to check that PHP is working. The default directory used by apache for serving files is /var/www/html, so the following commands create a blank file, add code to display php information and then save the file. To create a new file with nano:
nano /var/www/html/phpinfo.phpAnd paste in the following:
<?php

echo phpinfo();

?>
Save the file with Crtl+x, then "y" and Enter. Navigate to http://serverip/phpinfo.php and you should see the result of the function above.

When PHP is correctly installed, phpinfo() will return this
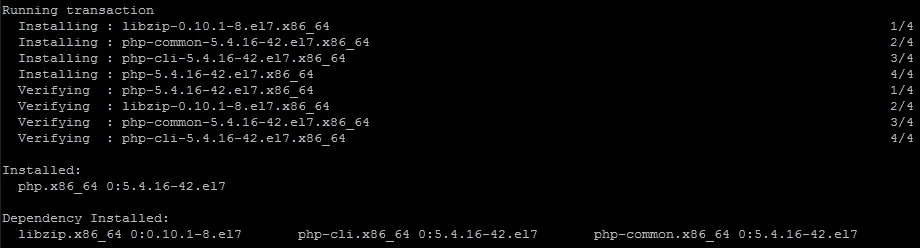
This gives us the base PHP install, but it makes sense to add a number of other packages that are used in a range of popular scripts (like Wordpress, Drupal, etc)
yum -y install php-gd php-ldap php-odbc php-pear php-xml php-xmlrpc php-mbstring php-snmp php-soap curl curl-devel php-mysql
The additional packages bring with them a number of dependencies
We'll just do another apache restart to sort out any unapplied modules and packages:
service httpd restartAnd we're good to go!
Step 7 - Install phpMyAdmin
We need to add the Fedora Extra Packages for Enterprise Linux (EPEL) repository - this is a free, open source repository that provides a huge number of additional packages that install through yum. This includes a large number of modules used by popular third party PHP scripts, openSSL, ProFTP, and most crucially for this section, phpMyAdmin.
yum -y install epel-release
rpm --import /etc/pki/rpm-gpg/RPM-GPG-KEY-EPEL-7
This will add the repository and the relevant key. We can now install phpMyAdmin:
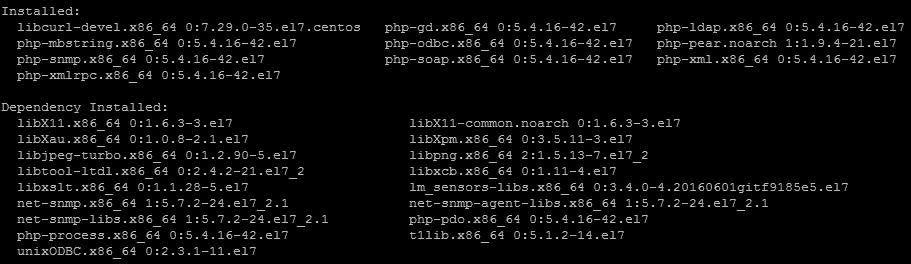
yum -y install phpmyadmin

phpMyAdmin brings even more dependencies
It's a good idea to restart apache again here, as some of the packages we just installed may not have been applied.
service httpd restartNavigate to http://serverip/phpmyadmin and you should be able to see the phpMyAdmin login page.
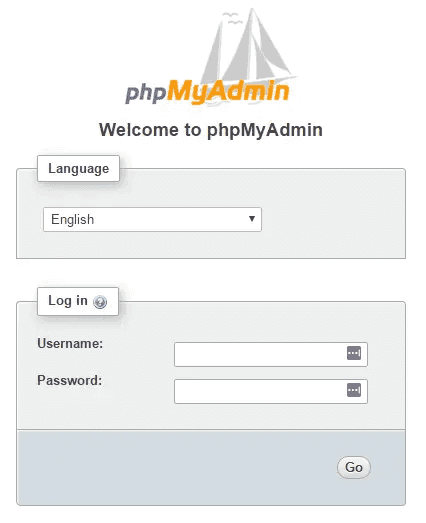
phpMyAdmin Login Page
Note that if you get a forbidden message, it's likely because phpMyAdmin is setup by default to only accept connections from 127.0.0.1 (localhost). As I'm only testing this on a local network, I'm going to open it up to all - but you could change this address to your workstation IP if you wanted to keep it secure.
nano /etc/httpd/conf.d/phpMyAdmin.confAnd change this:
<IfModule mod_authz_core.c>
# Apache 2.4
<RequireAny>
Require ip 127.0.0.1
Require ip ::1
</RequireAny>
</IfModule>
<IfModule !mod_authz_core.c>
# Apache 2.2
Order Deny,Allow
Deny from All
Allow from 127.0.0.1
Allow from ::1
</IfModule>
to this (add one line)
<IfModule mod_authz_core.c>
# Apache 2.4
<RequireAny>
Require ip 127.0.0.1
Require ip ::1
Require all granted
</RequireAny>
</IfModule>
<IfModule !mod_authz_core.c>
# Apache 2.2
Order Deny,Allow
Deny from All
Allow from 127.0.0.1
Allow from ::1
</IfModule>
Restart apache again:
service httpd restartAnd you should now be able to see the phpMyAdmin login page.
Other options
There are a number of web-based control panels which simplify management of your environment. Out of the available free options I've tried Webmin and CWP (CentOS Web Panel).
You may also want to tidy up permissions now and ensure your apps will be able to write to the default /var/www/html directory. For a dev server, you can keep it really simple and use:
chown -R apache:apache /var/www/htmlInstalling Webmin
To install Webmin via yum we need to add a new repository. To do this we'll create a new config file in the yum repo directory, and then import the required key.
nano /etc/yum.repos.d/webmin.repoIf you have nano installed, this will bring up the editor. If not, you can use another editor like vi.
Paste into the new file:
[Webmin]
name=Webmin Distribution Neutral
#baseurl=http://download.webmin.com/download/yum
mirrorlist=http://download.webmin.com/download/yum/mirrorlist
enabled=1
Save the file by typing Ctrl+X, and "y" followed by Enter to save.
Grab the key from the Webmin site:
wget http://www.webmin.com/jcameron-key.ascImport the key:
rpm --import jcameron-key.ascAnd finally, install Webmin using yum:
yum -y install webminWebmin will list it's access address, which will be https://serverip:10000, and use the existing root account and password for access. If you are using a server where you only have an access certificate (as Azure often does) then you may need to reset the webmin root password using the following command:
/usr/libexec/webmin/changepass.pl /etc/webmin root NEWPASSWORDNote that if you're using Ubuntu/Debian, replace "libexec" with "share".
Updated 04/06/2017 with chown for /var/www/html permissions.